Showing posts with label Recipes. Show all posts

Tuesday, April 15, 2014

Fermented Pickles


I have made refrigerator pickles before, but this time, I wanted to try my hand at fermented pickles. 

 Fermentation does not =alcohol, Sourdough bread is fermented. Fermentation produces those healthy bacteria we refer to as probiotics. Fermented foods have a plethora of health benefits.

Fermentation also helps stave off spoilage. Before people knew about probiotics, they knew that fermented foods last a long time. Before refrigeration, this was critical to survival. Now, in the age of global produce trade, it's still convenient and cost effective. I bought a half case of pickling cucumbers for $20. That's about 20-30 pounds of cucumbers. We ate about a third fresh, I pickled 15 quarts, and I lost a few to spoilage :( The salt and vinegar I used are negligible. That's a lot of food for $20. 

I used the instructions in Every Step in Canning: The Cold Pack Method, a free e-book available from Amazon and the Gutenberg Project. Originally published in 1920 as a pamphlet for housewives, I had to make a few adjustments. For instance, I used canning jars instead of a crock or wooden tub. I screwed my lids on instead of sealing my jars with paraffin, and I moved my jars to the refrigerator after they finished fermenting. I suppose, in theory, refrigeration is technically unnecessary, but I found that 2 additional days on top of the fridge made my pickles slightly more sour than I would prefer. I have room in the fridge, so in they went. They should be able to hang out in there indefinitely. I'm hoping to hold onto these until next spring. 

First, lets talk about cucumbers. 

Pickling cucumbers are smaller and firmer than garden cukes. The pickling process softens them a bit. While these raw pickles are much crisper than ones you find in the store or homemade heat-canned pickles, they do still need to be quite firm to hold up to the process. Garden cucumbers are better suited to a refrigerator pickle. 

Other veggies besides cucumbers will work well in this preparation. Watermelon rind, radishes, green tomatoes, green beans, turnips, carrots, and anything of a similar texture will work. I have only used cucumbers, but I do plan to do this with watermelon rind this summer. 


Alrighty, let's get started. 

First, wash your cucumbers well. If they come from a grocery store, they may have a wax coating. Scrub that off. Yuck.

Next, slice them, quarter them, or whatever. If you have a LARGE container, such as a glass gallon jar, you may leave them whole. Smaller jars won't hold whole pickles.

A word about containers. You want something stable. There is vinegar involved here. Metal and plastic are no-nos. Glass, crockery, even "non-pitchy wood", whatever that means, are fine. When in doubt, go with glass. 

Wash your containers. There is no need to sterilize as in canning. Just soap and water. 


These pickles are sliced the long way, and a sprig of dill rests at the bottom.


Next, pack your jars. If you wish, put a sprig or two of fresh dill in the bottom of your jar, or whatever spices you wish. You don't need dill or pickling spice. Most "dill pickles" in the grocery store have no dill. They are just plain pickles. My first batch was plain. They are quite flavorful all on their own. 

Then lay the jar on its side. Pack the cucumbers firmly into the jar. When the brine goes in, everything will loosen up and shift around a bit. You want them to stay in place.


Leave a bit of room at the top. The pickles must be completely submerged. If one piece sticks out, the whole jar will spoil. 

Brining solution

Now it's time to mix the brine. 

To one gallon of clean, filtered drinking water, add 1 cup vinegar and 3/4 cup salt. You can use whatever kind of vinegar and salt you like. This is a very mild brine. It's NOT a pickling solution. This solution alone will not preserve your pickles. The vinegar in this brine will only protect your cucumbers until the fermentation can kick in. It's just a booster. 

I chose raw, organic apple cider vinegar, mainly for the antifungal benefits. It's the only vinegar approved for Gem's Candida Diet. Because these pickles have no sugar, and no additives or preservatives-or dyes, did you know most pickles have yellow dye? Why?!!?-they are safe for Gem, and anyone else on a variety of special diets.

Choose your salt wisely. The salt will concentrate in the pickles. My kids reported that the pickles I made were very salty. (They still downed a quart for lunch, so they weren't bad, just saltier than expected.) Pickling salt is a low-quality salt. It has a strong flavor. I would recommend using a good-tasting salt with a flavor you prefer. I used an inexpensive sea salt

You will need half as much solution as the volume of your pickle containers. One gallon of brine will fill 2 gallon jars, or 8 quart jars. 


Fill the jars with brining solution to the tops. Make sure that the pickles are completely covered. If jars aren't packed tightly enough, the cucumbers may float to the top and spoil. 


Place the lids loosely. Don't screw them tight yet. Label them with the date. 


Place the jars in a safe, warm place. Heat speeds fermentation. I put mine on top of the fridge. This is my usual fermenting area :)  You can see my kombucha and my oil infusions up there as well.
In a day or two, you should see a few bubbles if you gently shake the jars. There's no sugar in here, so it won't get fizzy. Leave them up there for about a week. 

After they are sufficiently fermented, check the tops for scum. If any has formed, skim it off. Screw the lids on tightly. Move the jars to the refrigerator, a root cellar (if you don't live in Louisiana and you have one), or eat them up right away. 


Friday, April 11, 2014

Sushi Fried Rice


Our lunches are often thrown together from this and that, whatever I find in fridge and pantry. The results are often rather impressive. 
Today is one of those days. 
D brought home sushi a couple of days ago. I had leftover rice in the fridge. I tossed together the leftover dipping sauce and wasabi with a few pantry staples and -voila!- Sushi Fried Rice. 
Fried rice is one of my go-to recipes. It's much easier than you might think. The extra toppings turn a basic dish into something special. 

This is more of a process than a recipe. I didn't measure anything. It's all a matter of taste. I'll walk you through it. 

1. Heat a drizzle of oil in a skillet. 

2. Add diced onions. Saute lightly. Scootch them to the side. 

3. Beat an egg or two. Drizzle the eggs into the hot oil. Scramble. Scootch them over with the onions. 

4. Add the cold, leftover rice. Cold rice works best here. Other grains can be used in place of the rice. Quinoa is very good in this dish. 

5. Stir together the rice, onions and eggs, frying lightly. 

6. Pour dipping sauce or soy sauce over the top. Add a bit of wasabi. Stir well. 

7. Shred some carrot and sliver some pickled ginger and kale, if you have it. Fold those in. Heat through. 

8. Remove from heat. Spoon into bowls. Top with shredded nori and a sprinkle of sesame seeds. Serve. 


Sugar free, low carb oat bran-flax porridge


Gemini is on the Candida Diet to help his tummy feel better. He is doing very well, but unfortunately, his favorite breakfast of "eatsmeal" is contraband. 
Luckily, this breakfast is an excellent replacement.

Heat 1 cup of water to boiling.

Add 1/2 cup oat bran and 1/4 cup flax meal.

Stir constantly until thick and creamy.

Remove from heat. Spoon into a bowl.

Top with coconut milk, butter or substitute, and a half packet of stevia

He likes it. 


Thursday, March 27, 2014

Vegan sushi-How to make sushi at home


Earlier today, I posted about Vegan Fried Eggplant. I mentioned that it was meant to be used in sushi. 

Here's the sushi. 

Yum. Sushi.


First- definitions.

Sushi does not = raw fish. At all.

Sashimi is raw fish. Sashimi is sometimes used to make sushi, but not always. 

Sushi is a broad term which refers to a variety of tasty little morsels, usually (but not always) including rice, Nori seaweed papers, and fish, shellfish, egg, fruit and/or vegetable toppings/fillings. Some are cooked, some are not. Soy paper or thinly sliced cucumber (or, I'm sure, many other alternatives I haven't seen yet) can be used in place of the nori. Nigiri does not require any wrapper at all. Nigiri is essentially a block of rice with a slice of fish (usually raw) or some other topping, on top. 

The rolls that we often refers to as sushi, and which I show above, are called Maki, meaning log. Maki can be filled and sometimes topped with any number of ingredients and sauces varying widely depending on where one lives. In Japan, choices are limited and deeply traditional. In the US, we can get a little crazy.

The title of this post is Vegan Sushi. I used only nonanimal-derived ingredients. Sometimes we use cooked seafood, or eggs. I NEVER use raw fish. Never. D eats sashimi. I try not to watch.

Later in the post I will make grain-free, low carb, and raw sushi. Sushi can easily be gluten free. Just check your ingredients before you begin. Soy sauce is the big offender here. 


All right. Now that we know what we're doing, let's get started.

First, we set up our assembly station. 


The rice isn't here yet because it's still cooking. We'll handle that in a minute.
Clockwise from top left, we have a serving tray, cucumber ribbons, steamed asparagus, halved, carrot ribbons,the fried eggplant from earlier, nori,a sushi mat in a zipper bag, avocados, a small cutting board and a small, sharp, serrated knife.

You can use anything you like here. Real Japanese sushi is limited to seafood, pickled vegetables, eggs, and a few soy products. But we aren't in Japan, so we can use whatever we want. Here in Louisiana, some popular choices are fried crawfish, fried shrimp, cream cheese, crab, krab, local fish, strawberries, pineapple, oranges, jalapenos, cucumber, carrots, and fried tempura breading, called "crunchies". No joke.

Let's talk rice. 
Sushi rice that you can buy in the store is NOT Japanese sushi rice. It is illegal to import or export rice to and from Japan. Rice is sacred and traditional and not to be played with. At all. It is serious business. 

Sushi rice in the US is probably from California. It's an imitation, and in my opinion, not a very good one. So pretty much, use whatever rice you want. It doesn't really matter. Technically, sushi should be made with short grain rice, but I use local medium grain rice, and it works okey doke. Minute rice or anything out of a box should NOT be used. Cook some real rice. 

Traditionally, hot sushi rice is dumped into a large, flat, wooden bowl and paddled and fanned with paper fans to cool. I don't have a wooden bowl, so I use a stainless steel one. Use what you have. 

Woo wee! Look at that steam coming off that rice. 
Sushi rice should be seasoned with palm sugar, soy sauce and rice vinegar. I like to squeeze in a little wasabi paste, as well, but that is cheating. It should be added to the finished rolls. I don't mind.  Adding it to the rice lends the flavor without burning my children's lips off. 


Wasabi is a root, similar to a horseradish. If you can get fresh wasabi, grab it up. Store it in the freezer. Grate it into your rice. Lucky you.
For the rest of us, wasabi comes in powder or paste. Powder can be reconstituted into paste. I buy paste.
Check the package for the word "sauce". If it's there, put it back. It's mayonnaise that has been seasoned with wasabi. You don't want that.
If you can't find wasabi, or don't care for it. no loss. Just don't use it. 


Black soy sauce or sweet soy sauce is soy sauce which has been sweetened with palm sugar. I keep some in the house because it's dangerously delicious. Regular soy sauce and brown sugar will work, too. 


Rice wine vinegar has a light, clear, sweetish flavor. This one is diluted to 5% concentration. If you buy it from a regular grocer, it will probably be stronger. Use less. You don't want your rice to be acrid. 
If you don't have rice wine vinegar, apple cider vinegar is ok. 


This was 4 cups of uncooked rice. It's a really big bowl. Use about this much sauce. You can't see the vinegar, but it's in there. A little less than the other two.


Fold the rice over and over until sauces are evenly distributed and rice is cool. 

Now it's time to assemble the rolls. 

Sometimes we assemble at the table. I let the kids take turns choosing what goes into each roll. This is great fun for the kids, and wholly exhausting for me. Today, I preassembled. 

My production assistant


This is my sushi mat. It's made of little bamboo rods woven together with string. The zipper bag keeps it clean. When we're done, I wash the bag, and put it back in the drawer till next time.
The sushi mat is nice to have, but not necessary. I only use it when I'm having trouble. You can make rolls without one if you don't have one. If you do, use it. It might make it easier. 

I don't know my nori is half sheets instead of the usual square, but well, there it is.
Lay a single sheet of nori out rough side up. 


Use a rice paddle or large, flat wooden spoon to spread the rice on the nori in a thin layer. This is where the long-vs-short grain rice varies. Short grain rice is softer and stickier. 


Pro tip: Slice the avocado in half. Twist it like an oreo. It will come apart cleanly. Score the flesh all the way to the skin. 


Use a spoon to scoop out one slice at a time. 

To remove the seed, stick the tip of the knife into the seed and pop it out. 

Back to sushi making. 


Layer up some fillings in the center. 


Flip one side over the top and squeeze gently, tucking the end in on the opposite side. 


Open it up, and you should have something like this. 


Flip it around and do it again with the other side. You should now have-taa-daa!- a maki sushi!


Slice it carefully. Press the two ends towards each other and lift the whole thing. Place it on the tray. 

Repeat with lots of fillings. 

Cucumber

Asaparagus

carrots


A word about fillings: 

Keep it small. Thin slices, julienne, shreds, matchsticks, ribbons. Smaller is better.

Sushi is meant to be eaten in one perfect bite. Be mindful that your rolls are not over filled. 

Looks good.


Now, lets talk about gluten free, grain-free, low carb, raw sushi. This is easier than you think. 

Nori is generally considered to be raw because it is cooked at a low temperature. If you would rather, substitute raw kale leaves in their place. Use raw fruits, veggies, nuts and butters for you filling. 

For everyone else, leave out the rice. 

No rice


The process is the same, except that the rolls won't stick quite as well. The sticky rice does that. 


We don't slice these. Pick them up and eat them whole. For these, I do prefer the smaller nori sheets. I find the extra fillings...filling. I can only eat one or two of these and I'm stuffed. 


Pretty

Wasn't that easy?


Vegan Fried Eggplant


 I love fried eggplant. It's hearty and meaty, and it makes one heck of a burger. But I don't like making it with eggs. 

This batter is light and crispy without that heavy, eggy, soggy texture. 

I cut these guys into strips because they will be going into sushi rolls tonight. Normally the eggplant is sliced into rounds, battered, fried and topped with cheese and sauce, or served in a sandwich. You might find that you want to try serving these in some other manner. Go for it.

Eggplant is the meat-loving vegan's best friend. It happily takes the place of a variety of meats in many different dishes. 


To choose a ripe, not-over-ripe eggplant, look for a smooth, dark skin and firm, slightly spongy flesh. 


Ingredients:

1 large, ripe eggplant

Flour of your choice, approximately 2 cups

Cajun seasoning, salt and pepper, or other seasoning of your choice

1/4 cup water per 1tbs flax meal, adjust as needed

 A large amount of cooking oil for frying. I used coconut.


Heat 1 inch of oil in a large skillet over medium-high heat. Do not allow oil to smoke.  

Wash and slice eggplant. Set aside. 

Stir together flour and seasoning in a shallow dish. Start with one cup flour. Season to taste. 

In a small bowl, combine water and flax meal. Let sit for a few minutes. It will thicken. Add enough to make 2-3 inches. If you find it is too thick, add more water. If it's too thin, add more flax. It will continue to thicken while you cook, Add more water as needed.
The thicker the flax mixture, the heavier the batter. Adjust to your taste. 


Dredge eggplant in flax mixture, followed by flour mixture. 


Fry in oil till lightly golden brown. Turn and fry on other side. 

It's messy, but it's worth it.


Remove to a cooling rack on a baking sheet. 

Yummy. 

These sticks are great for kids to dip into ketchup or ranch dressing. 

1 medium-large eggplant made 2 of the trays shown above. 


Wednesday, December 4, 2013

Surprise Spice Muffins


My mom used to make a version of these muffins. I LOVED the little bite of warm applesauce hiding in the center. 
I don't just limit myself to applesauce for these muffins. A spoonful of jam, preserves, pureed fruit, Nutella, or anything else you fancy turns a regular old muffin into something special.
I used pear preserves in this batch, so I cranked up the spice to complement the fall flavor. 

1/2 cup sugar
1 TBS flax meal
2 TBS water
1 1/2 cups flour (All Purpose or whole grain)
3 TSP baking powder
1/2 TSP salt
1/4 cup olive or coconut oil
3/4 cup Almond or other milk
1 TSP vanilla
dash of nutmeg
sprinkle of cinnamon

Preheat oven to 350 degrees. Spray a muffin pan with cooking spray, grease lightly or line with cupcake papers.
In a large bowl, stir together sugar, water, and flax meal until well combined. 
Add flour, baking powder, salt, oil, milk, vanilla and nutmeg all at once. Stir until just combined.  
Fill muffins cups 2/3 full. Add a 1/2 tsp dollop of filling to the center of each cup. As it bakes, the filling will settle into the center. 

Bake 25 minutes. Cool well. the filling will be hot. 


Monday, December 2, 2013

Vegan Cinnamon-Flax Coffee Cake


My kids always light up when I tell them we're having cake for breakfast. I do, too, actually. Coffee cake always reminds me of my mom, PTA bake sales, coffee dates. There is something special about starting the day with a slice of cake. 


Before we begin:
Add 2 TBS of vinegar or lemon juice to 1 cup of milk of your choice. This is cheater buttermilk. It will curdle and thicken.
Add 1/4 cup water to 1 TBS flax meal. This replaces the egg you would normally find in a cake. 

For the cake:
2 1/2 cups flour of your choice. I used all-purpose, but you can use something else.
1 1/2 cups brown or raw sugar
1 tsp baking powder
1/2 tsp baking soda
1/4 tsp salt

Combine all dry ingredients. Add sour milk and flax mixture all at once. Stir till just combined. Do not over stir. 

Pour into prepared cake pan. 

For the topping:
1 cup flour
1 cup brown or raw sugar
1/2 cup flax meal
6 TBS melted coconut oil or butter substitute

Combine all ingredients. 

Spread evenly over the top of the unbaked cake.

Bake 45 minutes at 350 until a toothpick inserted in the center comes out clean. 
Cool 5-10 minutes. Serve warm. 


Harvest Chicken Salad and Pizza Bites

Harvest Chicken Salad


I don't cook or eat meat so much these days, but my husband occasionally does. This recipe uses a couple of pieces of leftover chicken and a handful of other ingredients to create a hearty, autumnal meal. 
This recipe makes enough for 4 generous sandwiches.


3 cup chopped, cooked chicken
2-3 TBS mayo
1 apple, diced
1 stalk celery, diced
2 tbs minced red onion, for color
bread or rolls, to serve

Mix all ingredients together. Serve on bread or rolls. 


Pizza Bites


When we have just a couple of slices of pizza leftover, but not enough to make a meal or divide evenly among the kids, I cut it up into little bite-sized pieces and serve it as a side dish or snack. 
Everyone gets a little bit, and no one fights over who got what kind or how big so-and-so's piece is. 


Lunch.

Thursday, October 17, 2013

No Sugar, Egg-free Oatcakes

These hearty cakes have a mild flavor that serves as the perfect medium for rich toppings. 

2 cups milk of your choice
1 cup flour
2 tbs flax meal
3 tbs oil
2 tsp baking powder
1/4 tsp salt

Combine all ingredients. Cook by the 1/4 on a hot, oiled skillet or griddle until brown and crispy on both sides. 

Serve hot with your favorite toppings.

Makes 6 cakes.

Strawberry Cupcakes and a Mad Hatter Tea Party


What is the difference between a muffin and a cupcake? Frosting. 
For Gemini's 4th birthday Mad Hatter Tea Party, I adapted my Vegan Blueberry Muffins to make these moist, tender, juicy pink cupcakes.
For the sake of simplicity, I used store bought frosting. Vanilla or cream cheese frosting pair perfectly with these strawberry cakes. 


3/4 cup sugar
1 TBS flax meal
2 TBS water
1 TSP vanilla
1/4 cup olive or coconut oil
1 1/2 cups flour (All Purpose or whole grain)
1 TBS baking powder
1/2 TSP salt
3/4 cup Almond or other milk
approximately 1 pint fresh or frozen strawberries
1-2 TBS flour


In a large bowl, stir together sugar, flax meal, water,  oil (melted if solid), vanilla, baking powder, and salt.

Add 1 1/2 cups flour. Stir until just combined.

Add milk, stir until just moistened.

Do not over stir these 2 steps. Over mixing will make your cupcakes will be hard and chewy. Batter should be thick and slightly lumpy.

In a separate bowl, lightly toss berries in 1-2 TBS flour. This helps evenly distribute berries in cupcakes, and prevents them from settling at the bottom.
Fold into batter. Spoon into prepared muffin pan, filling 3/4 full. 

Bake at 350 for 15-22 minutes, until toothpick comes out clean. Cupcakes should be pale and very moist.

Cool slightly. Remove from pan. Move to a wire rack to cool completely. Frost, decorate and serve. 


The set up.
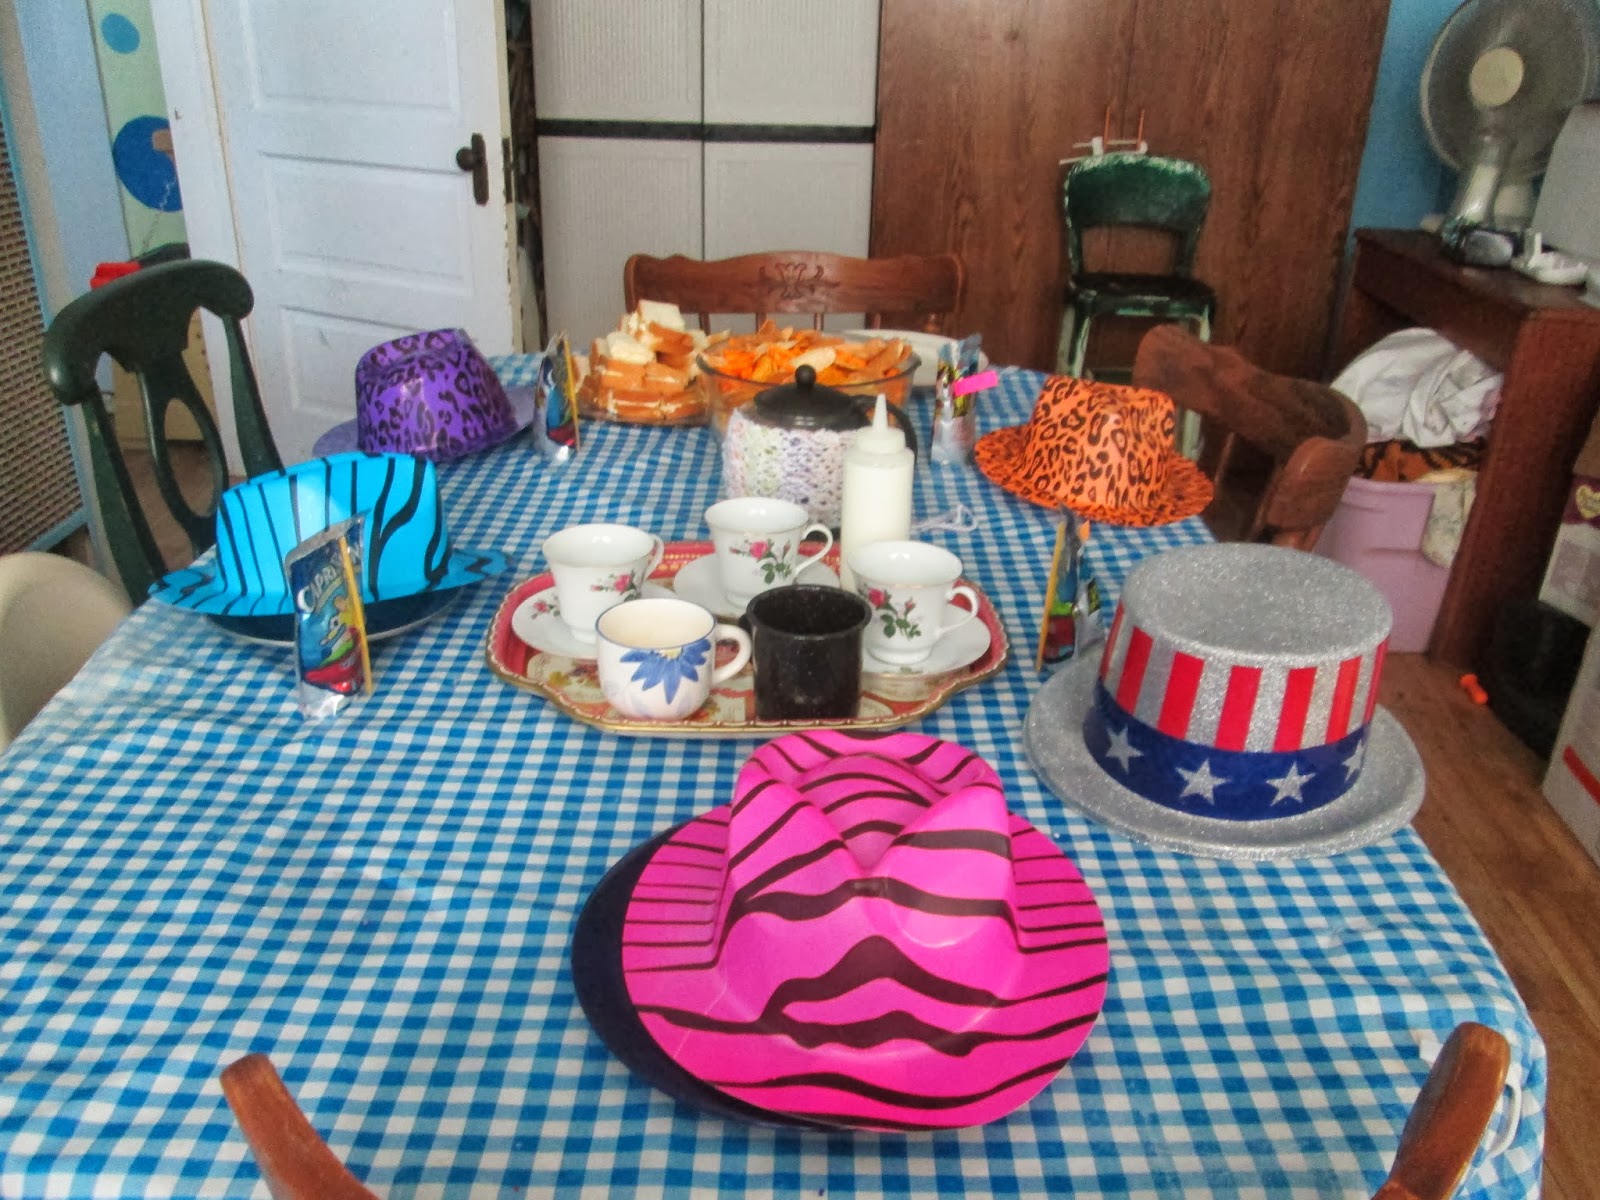
My collection of tea cups, a camping mug for the baby, tea, cream in a squeezy bottle, hats from the Dollar Tree, snacks. 

"Drink Me" Post It tags on Capri Suns

"Eat Me" egg salad finger sandwiches
Post It tags wrapped around tooth picks

Even the teapot is dressed up. I made this cozy just for the occasion. 

The Birthday Kid. Happy as a hatter. 

Party time! D was a good sport. <3

Gifts wrapped in kids' artwork.