Showing posts with label Homemade Fun. Show all posts

Tuesday, March 25, 2014

Loose Parts Playground


A hose reel, assorted bricks and stones, a stick, and wire mesh shelving. Black smith shop.


Not long ago, I started seeing mention of Loose Parts Playgrounds.  As I read the descriptions of giant blocks, boards and spools, it occurred to me that we have many of those elements in our own back yard. I have since made an effort to have them more accessible to my children. We will continue to add pieces as we come across them.

Everyone loves a cardboard box.

The concept behind a loose parts playground is simple. Instead of, or alongside, traditional playground equipment, provide children with large, heavy building materials that they can use to build life-size constructions.


Kids love blocks. They love to build, to create, to design. These materials allow them to build on a large scale. To build things they can walk on and climb into. Unlike tiny Legos and unit blocks, they can interact with their creations using their entire bodies.


Many of the pictures and descriptions I have seen are composed largely of specifically designed large scale toys, or carefully landscaped play areas. They are beautiful. And pricey. But we have built our collection out of scraps salvaged from our property and our home improvement projects.


Scrap wood- minus nails, screws, or obvious splinters- becomes a ramp, a bridge, a door, a wall. Assorted sized and shaped bricks are huge, weighty blocks, building muscles and increasing awareness of ones position in space. And boxes. We all know about boxes. 


Bottom line: Scraps+creativity= loose parts=fun.


Wednesday, December 4, 2013

Hands-on Studies: Playdough Labyrinth


By the kids' request, we have been studying ancient Greek mythology. We used a variety of picture books, but the bulk of our study comes from D'Aulaire's Book of Greek Myths

I can't say enough about this anthology. It is beautifully illustrated, simply and appropriately presented for children, thorough and complete. 

I have found that my children sit and listen better when their busy little hands are busy. I often hand out art supplies and have them recreate or illustrate some aspect of the story. Reading during mealtimes is a popular choice, as well. 

They have painted Heracles' feats, drawn the hydra with markers, watercolored Aphrodite rising from the sea, and now, built a labyrinth-complete with Minotaur and Theseus waging battle and Ariadne waiting by the door- of homemade playdough .


Each kid made his own version. I love seeing the variations in their individual interpretations.

Gemini's is a bit more abstract.

Giving them something to do that relates directly to the lesson engages different parts of their brain, creates new information pathways, holds their interest, makes the lesson more enjoyable for everyone, preserves mom's sanity, provides inspiration and an outlet for their creativity, and knocks out 2 subjects at once. Everybody wins!

Monday, December 2, 2013

Racing Ramp


1 piece of scrap wood + 1 monkey bars + toy cars + little boys = super intense fun

Thursday, October 17, 2013

Strawberry Cupcakes and a Mad Hatter Tea Party


What is the difference between a muffin and a cupcake? Frosting. 
For Gemini's 4th birthday Mad Hatter Tea Party, I adapted my Vegan Blueberry Muffins to make these moist, tender, juicy pink cupcakes.
For the sake of simplicity, I used store bought frosting. Vanilla or cream cheese frosting pair perfectly with these strawberry cakes. 


3/4 cup sugar
1 TBS flax meal
2 TBS water
1 TSP vanilla
1/4 cup olive or coconut oil
1 1/2 cups flour (All Purpose or whole grain)
1 TBS baking powder
1/2 TSP salt
3/4 cup Almond or other milk
approximately 1 pint fresh or frozen strawberries
1-2 TBS flour


In a large bowl, stir together sugar, flax meal, water,  oil (melted if solid), vanilla, baking powder, and salt.

Add 1 1/2 cups flour. Stir until just combined.

Add milk, stir until just moistened.

Do not over stir these 2 steps. Over mixing will make your cupcakes will be hard and chewy. Batter should be thick and slightly lumpy.

In a separate bowl, lightly toss berries in 1-2 TBS flour. This helps evenly distribute berries in cupcakes, and prevents them from settling at the bottom.
Fold into batter. Spoon into prepared muffin pan, filling 3/4 full. 

Bake at 350 for 15-22 minutes, until toothpick comes out clean. Cupcakes should be pale and very moist.

Cool slightly. Remove from pan. Move to a wire rack to cool completely. Frost, decorate and serve. 


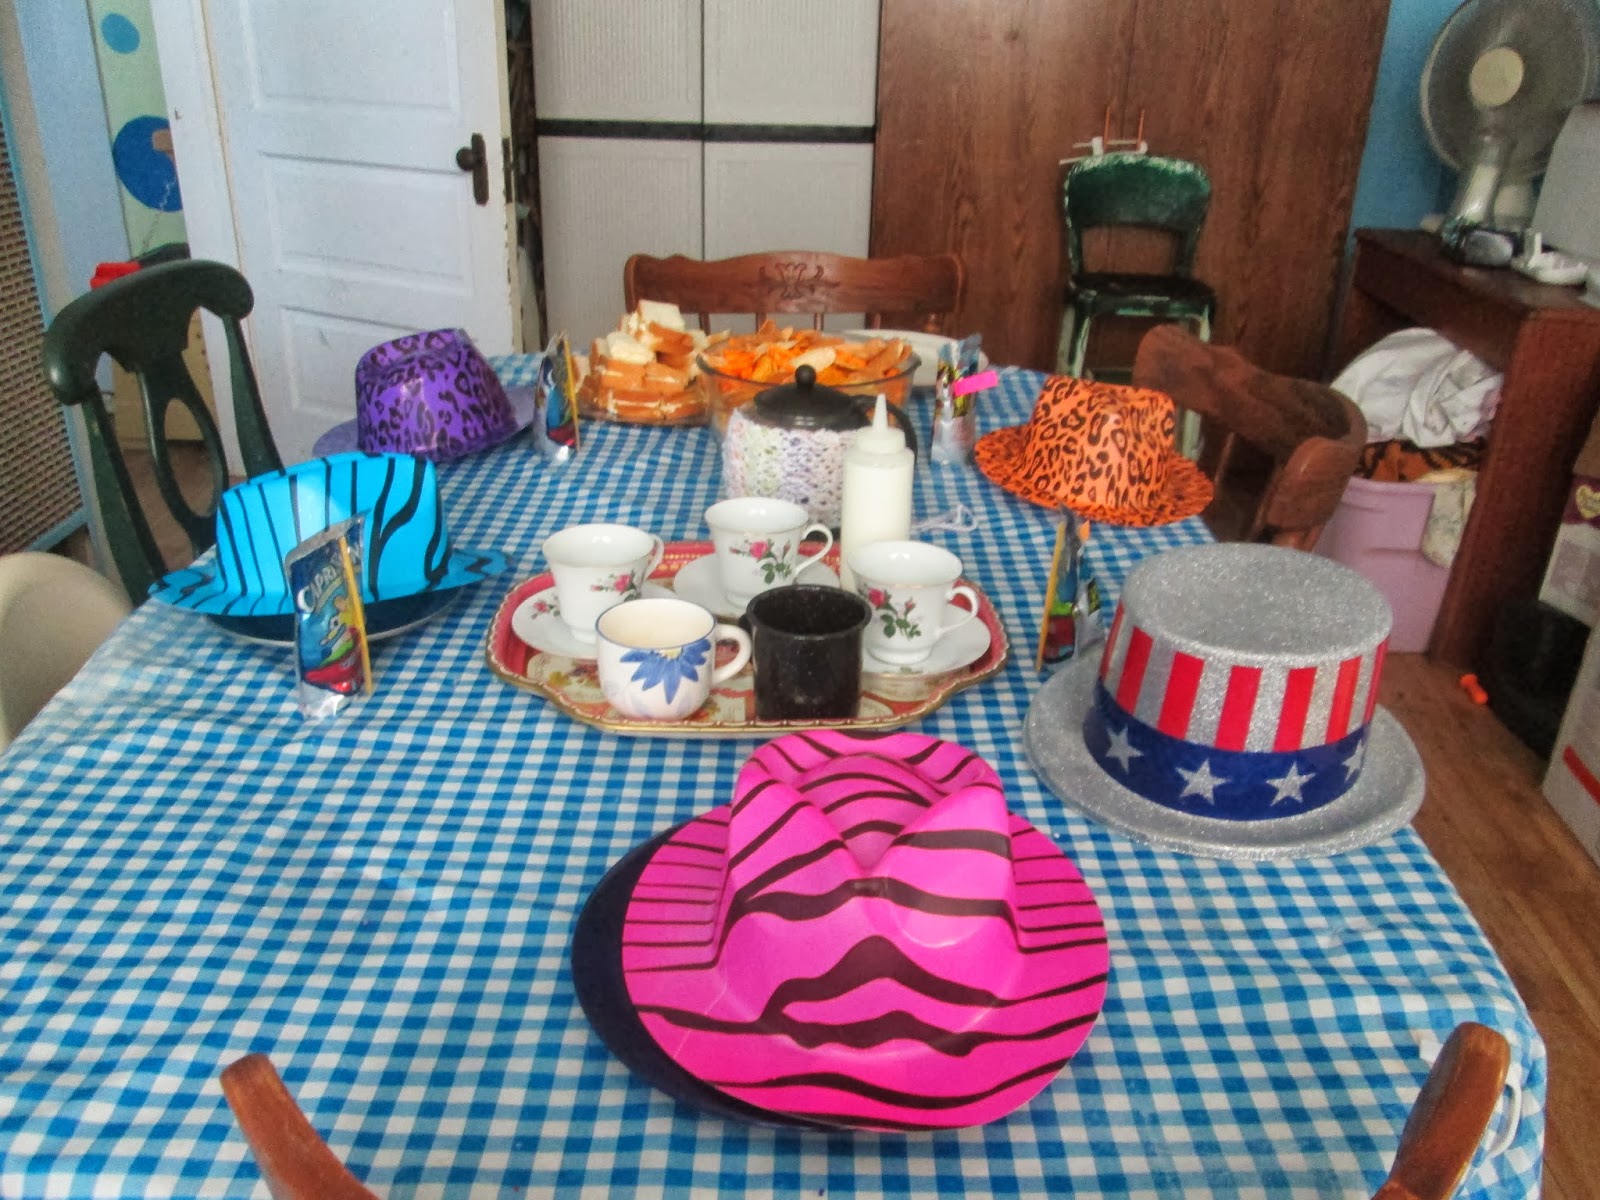
The set up.
My collection of tea cups, a camping mug for the baby, tea, cream in a squeezy bottle, hats from the Dollar Tree, snacks. 

"Drink Me" Post It tags on Capri Suns

"Eat Me" egg salad finger sandwiches
Post It tags wrapped around tooth picks

Even the teapot is dressed up. I made this cozy just for the occasion. 

The Birthday Kid. Happy as a hatter. 

Party time! D was a good sport. <3

Gifts wrapped in kids' artwork. 

Sunday, August 11, 2013

Easy Homemade Scented Play Dough


Play dough is so easy to make, smells better, feels better, and costs almost nothing. You can make it with items you already have in your pantry. 


The ingredient list is out of order, because the ratios are easy to remember- 2: 1: 1/2: 1/2.
2 cups flour- all purpose or bread flour work well
1 cup boiling water
1/2 cup salt
1/2 cooking oil
a few drops of food coloring of your choice
Scents listed below (optional)

In a large bowl, stir together dry ingredients. 

Add oil, boiling water, color and scent (if desired). Stir until a soft dough forms. Knead until smooth, adding a pinch of flour if needed. 

Dough will be very soft and warm. It will firm a bit as it cools. 

Store in an airtight container in the refrigerator. Because there are no preservatives, dough is not shelf stable. 

Scents:

You can any essential oil, extract or candy flavoring that you like. Here are some of our favorites.

Tangerine Essential oil
Lavender essential oil
Peppermint essential oil or extract
Rose essential oil
Lemon essential oil
Orange essential oil
Grapefruit essential oil
Spice blend scented oil
Blueberry scented oil
Cinnamon scented oil
Chocolate scented oil
Citrus spice scented oil
Vanilla extract
Almond extract
Coconut extract
Lemon extract
Butter flavoring
Chocolate mint flavoring
Apple flavoring
Grape flavoring
Cherry flavoring
Watermelon flavoring


Thursday, July 25, 2013

Strawberry Preschool


This year, I have two preschool aged children to keep busy, entertain, encourage and enrich. These two are a dynamic little duo. If I don't find them something to do, they will find themselves something, and I probably won't like it. 

I have been collecting quiet school time activities for them for at least a year. But, I had no plan to use them. I found myself pulling the same 3 items out of the closet over and over. 


The first thing I did was make a little structure for their day. 

1. School time activity
2. Coloring/art/craft
3. Read stories
4. Free play in playroom
5. Free play outside

Next, I took inventory of our available materials. I made two numbered lists. One for non-messy school time activities, one for artsy-crafty type activities. 

PreK Activities
1. Tangrams 
2. Sandwiches  and cookies
3. Magnets-letters, numbers, shapes, with small, metal trays
6. Puzzles-wooden board and small pieces
7. Shape Sorter
12. Crayons and coloring books
13. Hammer and tack nails
15. Pipe cleaners
17. Beans and Rice boxes- tubs filled with dry rice or beans, and miniature sand toys

Creative Activities
1. Crayons and paper
2. Cut and paste
3. Craft Kits
4. Stamps and paper
5. Stickers and paper
6. Water colors
7. Finger paint
8. Markers and paper
9. Play dough and toys
10. Colored pencils and paper

Most of these items came from the Dollar Tree or Target's Dollar Spot. Many were gifts. Keep your eye out for things that look like fun, whether they are meant as toys or not. 

I have a planner for the first time this year. I made sure I had a space for the toddlers. I scheduled in one of each type of activity each day. Yesterday was cut and paste (I just introduced scissors and cutting paper. I gave each of them a used piece of construction paper and a pair of safety scissors), and wikki stix  (we got these in kid's meals). Gem also requested some Mr. and Mrs. Potato Head time, so they also did that. 

That takes care of most of school-at-the-table time. Now they need some Mom Time. 

We go to the library every 1-3 weeks. I check out 8 picture books - 4 of my choice and 4 of Gem's choice. I have over 200 children's books downloaded onto my Kindle, many of them picture books. The little people have a reasonably substantial collection of books in their shelf. 

We have a quiet snuggle, and read together. 

Each day, we read 4 books. 
1 ABC book
1 Counting book
2 story books 

Last, I set aside a little time each day to sing songs, do finger plays, and otherwise connect with the tiniest of these. I have The Little Big Book for Moms next to my chair for inspiration. We have a few other books of this same sort. 

Snacks, meals, naps and joining in with group art, science, literature, music, game time and religion lessons round out their day.


Sunday, September 9, 2012

Bottle Bubble Blowers

To make a bottle bubble blower, cut the bottle off a soda bottle, dip the open end in bubble solution and blow gently. Any size or shape plastic bottle will work. These toddler friendly blowers make huge, delightful bubbles. If you inhale instead of blowing, or blow and then remove your lips, the bubble will slide back up the inside of the bottle. I had as much fun with these as the kids did.

This bubble solution is one cup of dish soap, one cup of water and a bit of corn starch. I'm still working out the kinks in the recipe. The good part is that it retains the color and scent of the soap. I used the cheap, pink, flowery stuff. It smells good and I find the color appealing. At $1 for a large bottle, we should be all set for a long time. Also works as bubble bath.

My first attempt at embedding videos:


Thursday, April 5, 2012

Homemade fingerpaint


Making finger paint is surprisingly easy. It has no smell, it's much less expensive than store bought, is all natural, safe and edible. This recipe only requires 3 ingredients that you probably have in your kitchen.


Begin with 2 tbs cornstarch per cup of water. Mix cornstarch in a small amount of water. Once well blended, add to the rest of the water in a saucepan.


Whisk and cook over high heat. Continue stirring constantly. If you stop stirring, say, to take a picture for your blog, lumps will form. If you find it's getting very thick, whisk in some more cold water.


Bring to a boil and continue cooking and stirring until thick, bubbly and fairly clear. Mine is very thick, so it stayed a little cloudy. If you mix it thinner, it will come completely clear. 


Let it cool slightly. It will thicken as it cools. Divide into bowls, one for each color.


Stir in food coloring. I MUCH prefer cake decorating colors. The intensity is so much greater than the liquid. This recipe used up the last of the set I bought 11 years ago.
These are gel colors, but paste colors work equally well. You can find them at any major craft store in the cake decorating section, at some grocery stores in the baking aisle, or a cake decorating store. For those of you  local to me, the Targil spice factory store has a HUGE selection of very well priced colors.


Mix one color into each bowl. Look how vibrant those are. Don't you want to stick your finger in one? I did.


Portion out the paints for each child. A little goes a long way.
This was a huge batch. All 3 kids used less than a third of the paint. Excess paint can be stored in an airtight container. If the paint gets a bit too thick, revive it with a few drops of warm water. I prefer to store in glass canning jars. Paint will stain plastic containers.


Lay down an old towel, newspaper, or a plastic sheet or tablecloth. This paint will stain. Start creating!

For this project, my kids did apple prints. Slice an apple in half (or thirds if you have an odd kid), dip in paint and stamp on paper.


Gratuitous pictures of my children:


Baby W didn't join in, but he enjoyed observing.

Some variations:
If your child is allergic to corn, you can substitute a TBS or 2 of white flour in place of the cornstarch. The result will be cloudier and a bit grainier but equally effective.

Likewise, arrowroot or any other thickener can be subbed, but I cant' give you amounts, as I've only used flour and cornstarch. Both thickener and water can be added during cooking until desired thickness is reached. Mix thickener with a bit of water before adding to avoid lumps.